WebEngage
Great relationships are built on meaningfull, effective, thoughtful, relevant, emotional and personalized communication.
WebEngage helps you craft contextual and personalized campaigns to engage your users through Push Notifications, In-app Messages, SMS, Web Push, Emails and more!
{primary} Stackpile makes it easy to install WebEngage on your website and start sending data to all your integrations with a simple unified API.
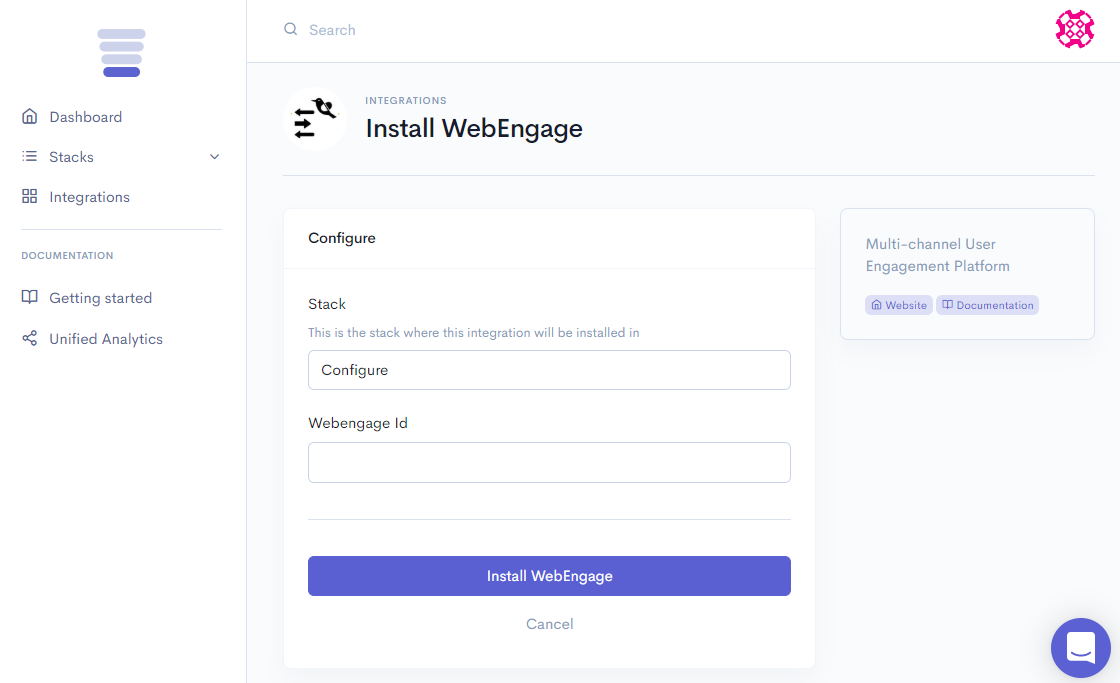
Install WebEngage
Getting Started
{primary} Important
If you already have the WebEngage snippet installed on your site, please remove it.
Once the Stackpile snippet has been installed on your website, add WebEngage to your stack on your Stackpile Dashboard, add your Webengage Id (see Settings on how to obtain this) and click on Install WebEngage.
The Stackpile - WebEngage integration will then run your notifications, surveys, feedback & web push campaigns on your website.
Settings
Webengage Id (called License code in WebEngage)
You can find your License code on your WebEngage dashboard. Log in to your WebEngage Dashboard and go to your Account Setup section, as highlighted in the image below. Note that your License Code might start with a tilde (~).
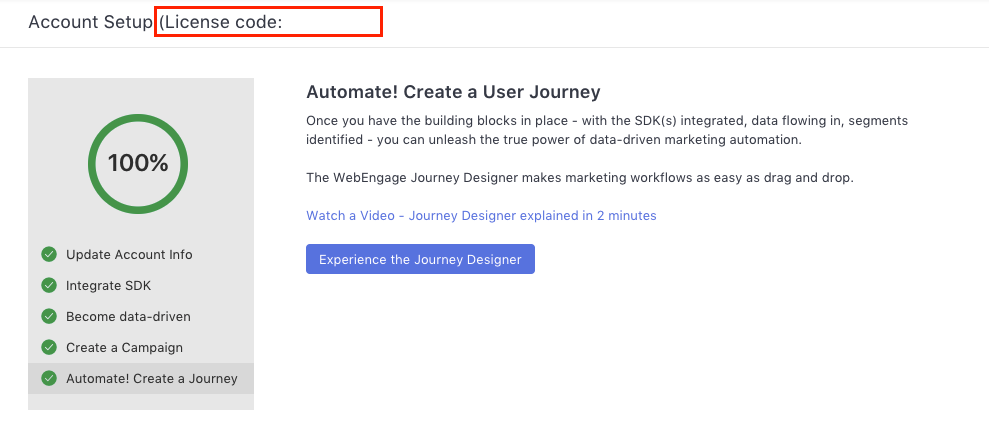
e.g. {primary} Account Setup (License code:
~66218905)